Cookie Policy

Effective Date: 09-Aug-2023
Last Updated: 09-Aug-2023

What are cookies?

This Cookie Policy explains what cookies are and how we use them, the types of cookies we use i.e, the information we collect using cookies and how that information is used, and how to manage the cookie settings.

Cookies are small text files that are used to store small pieces of information. They are stored on your device when the website is loaded on your browser. These cookies help us make the website function properly, make it more secure, provide better user experience, and understand how the website performs and to analyze what works and where it needs improvement.

How do we use cookies?

As most of the online services, our website uses first-party and third-party cookies for several purposes. First-party cookies are mostly necessary for the website to function the right way, and they do not collect any of your personally identifiable data.

The third-party cookies used on our website are mainly for understanding how the website performs, how you interact with our website, keeping our services secure, providing advertisements that are relevant to you, and all in all providing you with a better and improved user experience and help speed up your future interactions with our website.

Types of Cookies we use

You can change your cookie preferences any time by clicking the cookie icon. This will let you revisit the cookie consent banner and change your preferences or withdraw your consent right away.


In addition to this, different browsers provide different methods to block and delete cookies used by websites. You can change the settings of your browser to block/delete the cookies. Listed below are the links to the support documents on how to manage and delete cookies from the major web browsers.


Chrome: https://support.google.com/accounts/answer/32050
Safari: https://support.apple.com/en-in/guide/safari/sfri11471/mac
Firefox: https://support.mozilla.org/en-US/kb/clear-cookies-and-site-data-firefox?redirectslug=delete-cookies-remove-info-websites-stored&redirectlocale=en-US
Internet Explorer: https://support.microsoft.com/en-us/topic/how-to-delete-cookie-files-in-internet-explorer-bca9446f-d873-78de-77ba-d42645fa52fc

If you are using any other web browser, please visit your browser’s official support documents.

Cookie Policy Generated By CookieYes – Cookie Policy Generator
Quick Start Guide

SALES2CASH is one of the easiest apps to install in Salesforce. By default the app is disabled when you install it, and it does not modify any of your existing configuration. The main steps are:
  • Install SALES2CASH
  • Update Product2 and Opportunity Layouts
  • Set Product Schedules & Tax Accounts
  • Assign Permission Sets
  • Turn on SALES2CASH

Install SALES2CASH

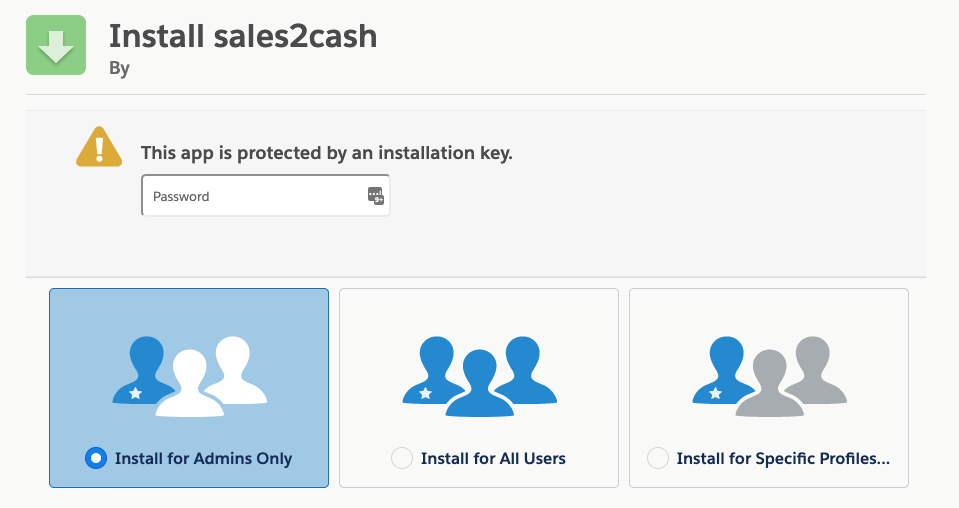
Using the provided link and password, fist install SALES2CASH into a Sandbox for testing. We recommend selecting “Install for Admins Only” and then use the Permission Sets we have provided for your users to control who can do what. SALES2CASH generates a lot of sensitive accounting data and you don’t want all your users messing with it!
Sales2Cash - Salesforce Installation Screen for Admins Only

Update Page Layout

Product 2

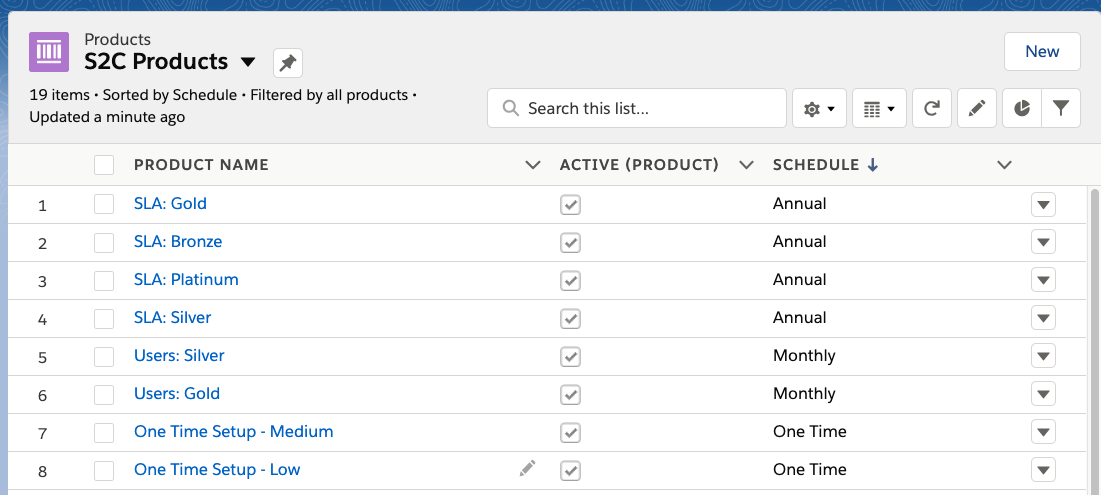
We do not provide a Page Layout for Product2, there is only 1 new field “Schedule” so please add these field where needed. Any Products that you want to use need to have a Schedule selected.

Opportunity

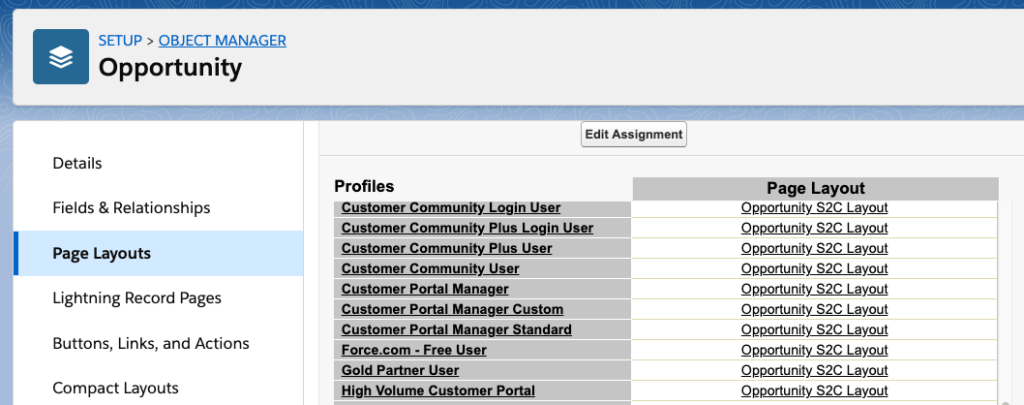
We provide “S2C” page layouts for both Opportunity and Opportunity line items.  Take a look and decide if you want to use them or just mimic them and pick the fields you want.  If you don’t have any custom fields on Opportunity, it’s probably easier to just switch your users Page Layout Assignments to the ones provided by us. Also make sure your users can use the “Opportunity Builder” button that we provide.
Sales2Cash - Assign Page Layouts on Opportunity

Set Product 2 Schedules

SALES2CASH comes with three Product Schedules:
  • One Time
    • The Sales Price will be charged once
  • Monthly
    • The Sales Price will be multiplied by the number of Months like $20/user/month
  • Annual
    • The Sales Price will be charged once per year like $1,000/year
Sales2Cash - Set Product2 Schedules

If you are going to Sync with an Accounting system like Quickbooks online, you need to also set the Income Account field on your Products to exact match the name of your Income Accounts in your Accounting System.  In Quickbooks Online these are likely:

  • Sales of Product Income
  • Service

Assign Permission Sets

SALES2CASH comes with 4 convenient Permission Sets:
  • Admin
  • Sales
  • Contract Manager
  • Finance
You only need to provide permissions to users you want to see any of the new SALES2CASH components.  Sales reps without any permissions will still cause Contracts to properly generate when they mark an Opportunity as “Closed Won.” They just won’t be able to see the Contract.
Sales2Cash Permission Sets

Set Defaults and Activate SALES2CASH

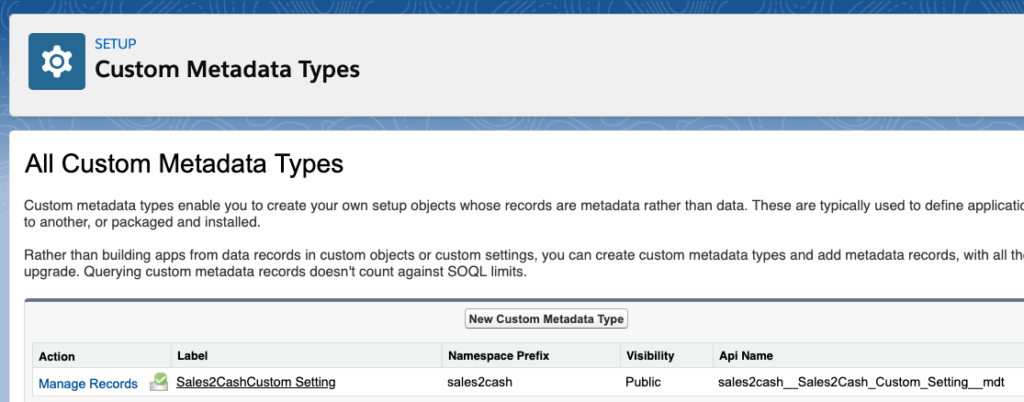
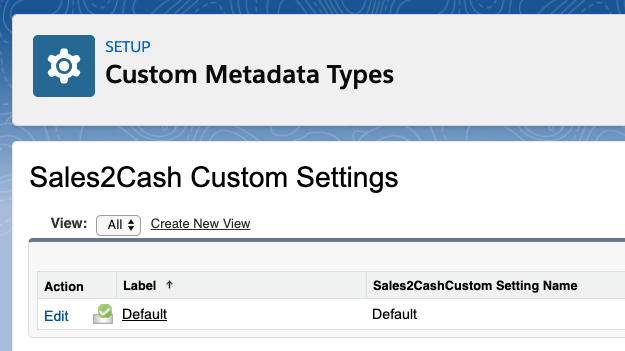
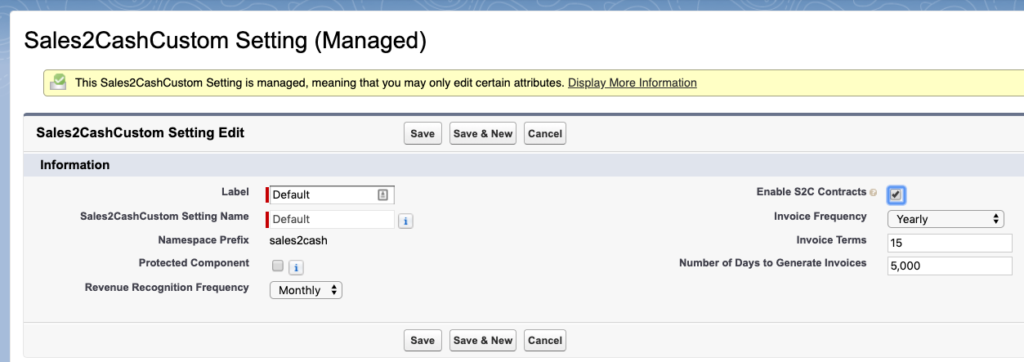
SALES2CASH uses a custom MetaData record to store default settings an allow you to activate and deactivate all the triggers/features easily. Make sure to check “Enable S2C Contracts”
The image is a screenshot of the Sales2Cash app, showing the setup window with custom metadata types.
The image is a screenshot of the Sales2Cash Salesforce App, showing custom settings.

That's It! Go and try it out

  • Go create a new Opportunity
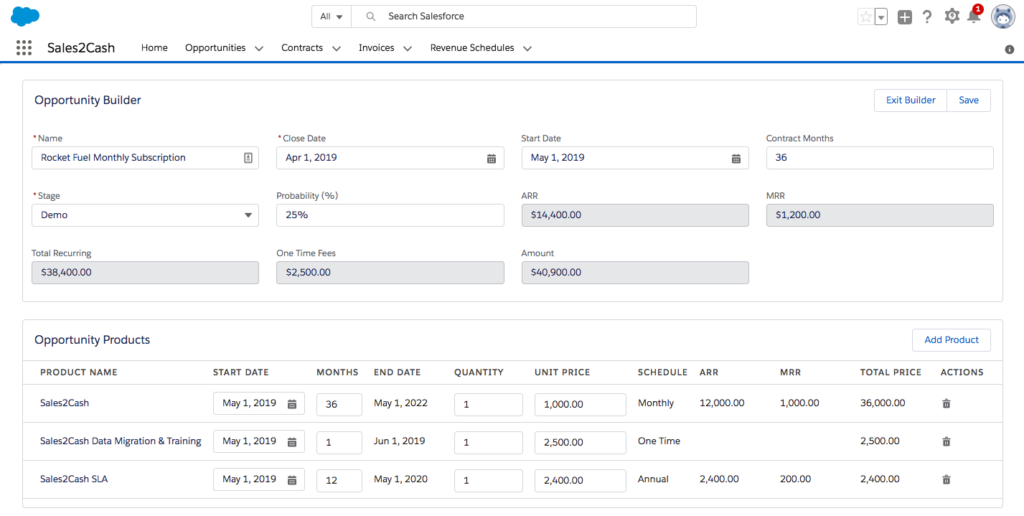
  • Use the “Opportunity Builder” button to add Products
  • Change your Opportunity to Closed Won
  • Verify a Contract was created and linked to the Opportunity
  • Change the Contract status from Pending to Approved
  • Invoices will generate immediately (you might need to refresh in Lightning)
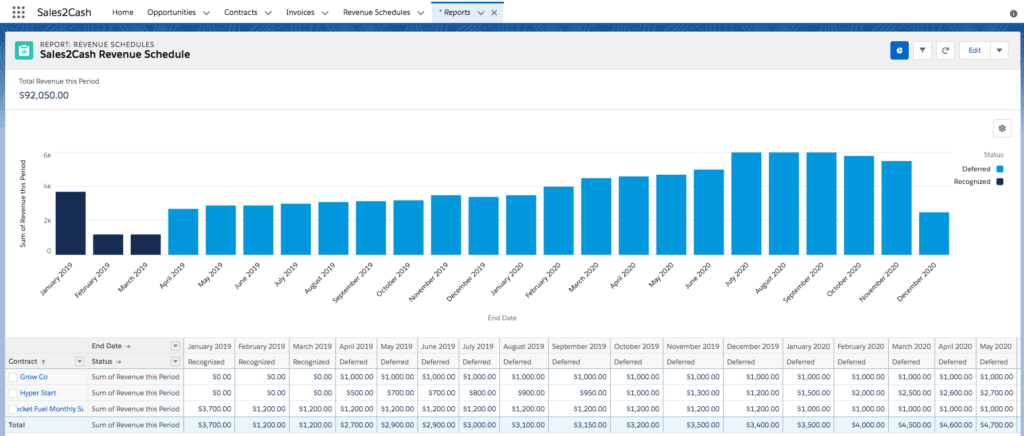
  • Revenue Recognition generates on a short delay (usually less than 1 minute)
Sales2Cash Opportunity Builder

Once you have some Revenue Recognition records you can checkout the report:

Revenue-Recognition-ASC-606-Report

Bringing in all your old Contracts

You can easily import all your existing contracts.  If you create import files for the Contract and Contract Items, you can change them all to Approved. They will automatically generate Invoices and Revenue Recognition. Then change the Invoice status to “Historic” so they will be ignored when syncing with Quickbooks Online.

If you want existing Opportunities to update these new Contracts, you need to associate the Opportunity with the Contract before you mark the Opportunity as Closed Won, so it knows to update that Contract.

Sync to Quickbooks Online

Once everything is running smoothly, contact us to complete this portion of the setup.